


How to Cook Frozen Green Beans in an Air Fryer
Aug 31, 2026
Leave a message
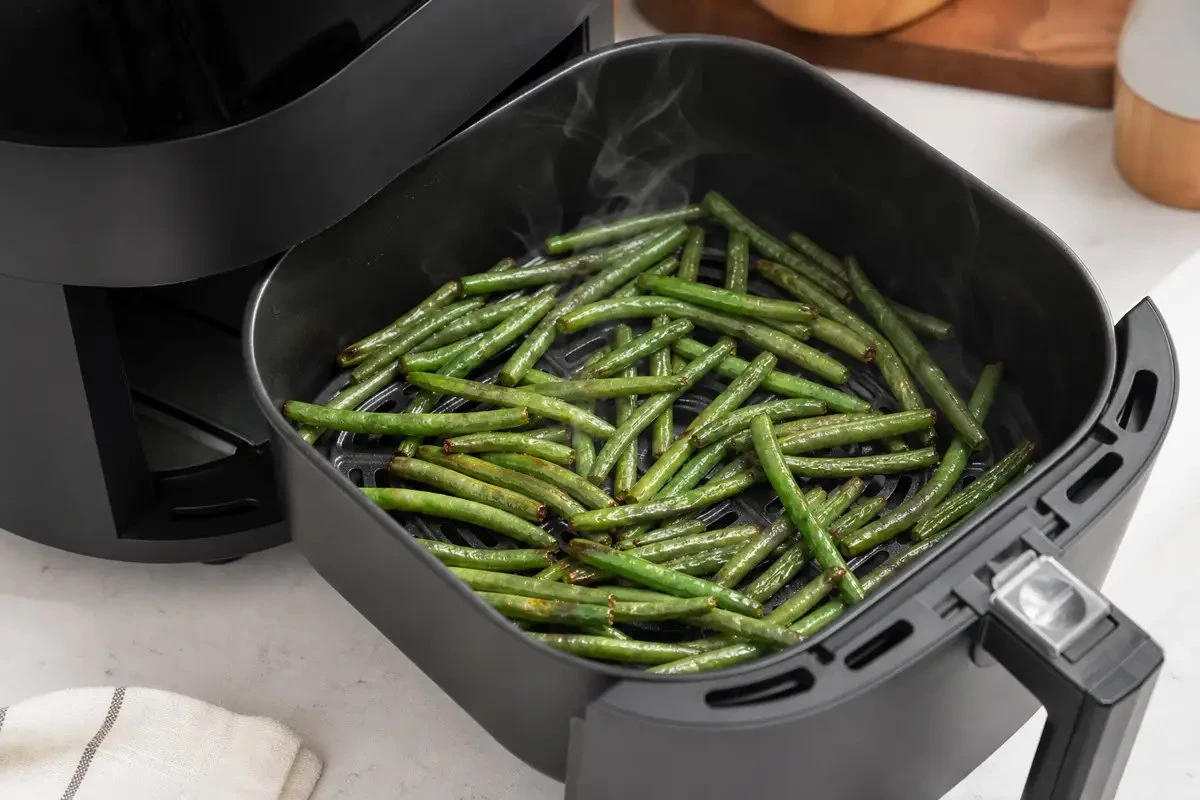
Use the air fryer as a fast moisture-removal tool first
Put loose frozen beans in the basket without thawing. Cook at 400°F/205°C for 3–4 minutes, shake out any loose water, then toss with a light coating of oil, salt, pepper, and dry spices. Continue for roughly 7–10 minutes, shaking once or twice. A compact basket, thick beans, or heavy load needs extra time; a hot wide basket and thin beans finish earlier.
A shallow 8–12 oz/225–340 g load is more repeatable than a full one-pound bag in a compact basket.
Release frost first, then coat the beans so oil stays on the surface instead of mixing with meltwater.
A thorough shake exposes new surfaces to moving hot air and separates pieces that were touching.
Fresh garlic, cheese, sugar, lemon, and wet sauce can burn or soften the beans when added too early.
Why air frying can improve frozen green beans-and why it sometimes fails
An air fryer is a compact convection oven. A fan drives hot air around a perforated basket, moving humid air away from the food faster than a covered skillet or microwave. That makes it useful for frozen green beans, which release surface frost and internal moisture as they heat. The appliance can dry the skin and create browned tips before the center becomes excessively soft.
The same compact design creates the main failure. When the basket is filled deeply, the upper beans intercept the air while the lower beans sit in a humid pocket. The appliance still sounds powerful, yet most pieces are steaming. Adding more time dries the exposed top layer and leaves the covered layer soft. The correction is a smaller load and better redistribution, not automatically a higher temperature.
Air fryers also differ more than recipe cards suggest. A wide dual-zone drawer gives a load more surface area than a narrow bucket. Some models preheat automatically; others begin with a cold chamber. Heating elements sit at different distances from the basket, fan speeds vary, and the displayed temperature is not always the actual food-zone temperature. This is why a useful recipe gives a starting range and a short adjustment loop.
Frozen bean format matters too. Slender whole beans and French-cut strips expose more surface area and color quickly. Thick whole or cut beans hold more water and need a longer heating stage. A bag with light frost behaves differently from a hard clump with loose snow. Keep the first trial simple: one bean format, one measured load, one temperature, and one recorded endpoint.

Air fryer timing by bean format and load
| Bean and basket condition | Starting point | First action | Likely total range |
|---|---|---|---|
| Slender whole beans, 8–10 oz / 225–280 g, preheated | 400°F / 205°C | Shake and oil at 3 minutes | 8–12 minutes |
| Regular whole beans, 10–12 oz / 280–340 g | 400°F / 205°C | Shake and oil at 4 minutes | 10–14 minutes |
| Thick cut beans, 10–12 oz / 280–340 g | 400°F / 205°C | Shake at 4 minutes; check center at 12 | 12–16 minutes |
| French-cut beans, shallow load | 375–400°F / 190–205°C | Shake at 3 minutes | 7–11 minutes |
| Cold-start appliance | Same set temperature | Expect a longer first stage | Add about 2–4 minutes, then calibrate |
| Deep or one-pound / 450 g load | Split into batches | Do not solve depth with time alone | Capacity-dependent |
These ranges are calibration points, not appliance guarantees. The live recipe set we reviewed clusters around 375–400°F and about 10–15 minutes, but basket geometry and load change the result. Check two minutes before the early edge of the range whenever you use thin beans, a powerful model, or a second batch in an already-hot appliance.
The reliable two-stage air fryer method
- Measure a realistic basket load. Begin with 10–12 ounces/280–340 grams for a typical medium basket. If the beans form a deep, compact pile, remove enough to create a loose layer.
- Inspect the frost. Lift out loose ice instead of pouring it into the basket. Do not thaw a freely separating bag. Briefly de-ice, drain, and blot only if the beans are locked together.
- Preheat if your appliance benefits from it. Set 400°F/205°C. A model that reaches temperature before loading gives a faster, more repeatable first evaporation stage; a cold-start model simply needs an earlier check and likely more total time.
- Air fry dry for 3–4 minutes. This is not the final cooking stage. It loosens pieces and moves surface water away before oil and seasoning enter.
- Shake, inspect, and drain if needed. Pull the basket out safely. Shake firmly. If water has pooled below a removable crisping plate, follow the appliance instructions before discarding it; never tip hot water toward the heating unit.
- Add a modest coating. Toss with one to two teaspoons of oil for a 10–12 ounce load, plus salt, pepper, garlic powder, onion powder, paprika, or another dry spice. Avoid a wet marinade at this stage.
- Continue for 5–7 minutes. Shake once midway and use tongs to separate any stubborn overlap. Keep the drawer open only as long as needed.
- Use a two-minute adjustment loop. Taste a cooled test bean. If the center is still cold or firm, add two minutes. If the center is tender but the surface is pale, add one or two minutes only if the bean can tolerate more drying.
- Finish late and serve promptly. Add fresh garlic or Parmesan for the final two to four minutes. Add lemon, vinegar, herbs, butter, chili crisp, or sauce after cooking. An uncovered serving dish preserves the surface better than a tight lid.
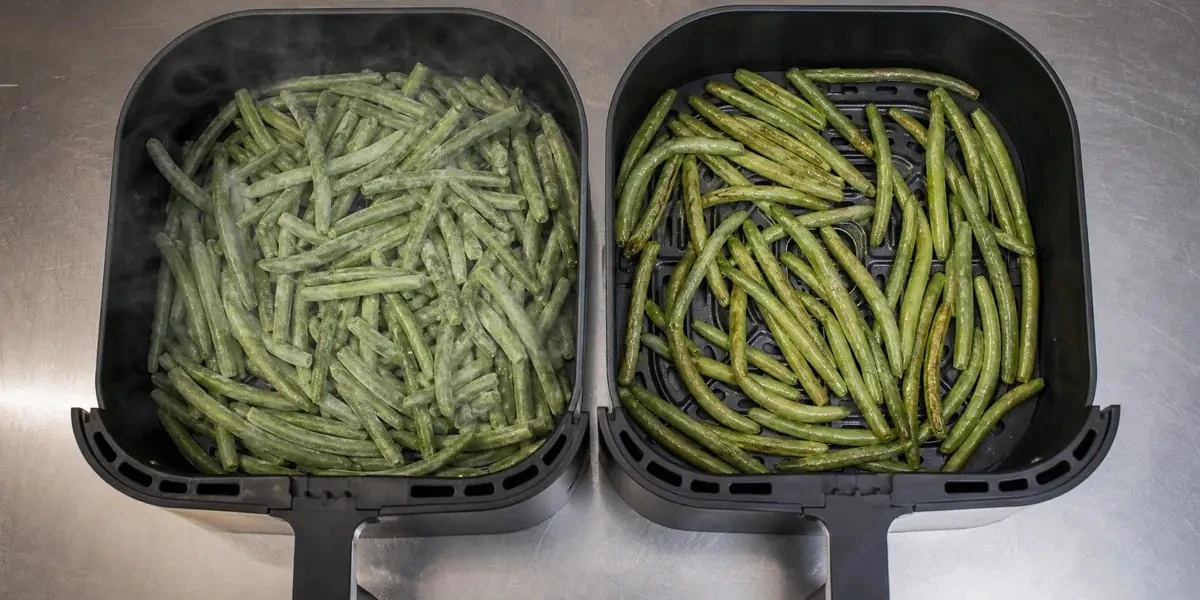
Oil, garlic, Parmesan, breading, and sauce timing
Oil: a small amount improves seasoning adhesion and surface heat transfer. Adding it after the short dry stage makes the dose more efficient. Too much collects under the basket and can produce smoke according to the appliance design, so follow the manufacturer's restrictions.
Fresh garlic: add minced garlic near the end. The heating element is close to the food, and small garlic pieces can blacken while the center of a thick bean is still warming. Garlic powder tolerates the full browning stage better.
Parmesan: finely grated cheese adheres more evenly than long shreds. Add it for the final two to four minutes and watch closely. Cheese mixed with breadcrumbs colors faster than the vegetable underneath.
Breading: a heavy wet batter is not a direct extension of this method. It changes airflow, drip behavior, cooking time, allergen control, and cleanup. Use an air-fryer recipe developed for the coating, and never allow loose crumbs to contact a heating element contrary to the appliance instructions.
Wet sauces: soy glaze, honey, barbecue sauce, lemon juice, and chili sauce should normally be tossed with the cooked beans or applied only in the last minute. Early liquid lowers surface temperature; sugar can scorch. If sauce is part of a commercial frozen kit, calibrate the complete kit rather than treating the pellet or sachet as an optional finish.
Stop with four endpoint checks
Center: a test bean is hot through and tender with the bite you want. Cool it briefly before tasting because the surface can be extremely hot.
Surface: the skin has lost its wet sheen and shows light blistering or browned tips, not a uniformly shriveled shell.
Basket: there is no obvious pooled meltwater and the pieces redistribute when shaken.
Aroma: seasoning smells toasted, not bitter. Remove the beans if thin tips, cheese, garlic, or sugary spices begin to smell scorched.
Troubleshooting air-fried frozen green beans
| Result | Likely cause | Next-run correction |
|---|---|---|
| Soft and pale | Deep load, heavy frost, or wet sauce | Split the batch, remove loose ice, stage the sauce |
| Dry and wrinkled | Too long at high heat or thin mixed pieces | Check two minutes earlier and separate formats |
| Burnt top, cool bottom | Insufficient shaking or compact pile | Reduce load and redistribute more thoroughly |
| Bitter garlic or cheese | Added at the start near the element | Add only for the final two to four minutes |
| First batch good, second dry | Hot basket shortens recovery | Check hot batches one to two minutes earlier |
| Crisp in basket, soft at table | Covered holding traps steam | Serve promptly and finish wet flavors at service |
Reheating and holding without losing the dry surface
Air-fried green beans are best served immediately. Refrigeration pulls moisture back toward the surface, and a covered container traps condensation. For leftovers, chill promptly in a suitable container. Reheat a shallow portion at about 375°F/190°C for three to six minutes, shaking once, until hot through. Begin at the low end because the beans are already cooked.
Do not judge reheating only by renewed browning. The center needs to be hot, but every extra minute removes moisture and softens the distinction between tender and dry. Reheat sauce separately when practical, then combine at service. A fresh acidic finish, toasted nut, or crisp crumb can restore contrast without overcooking the vegetable.
For catered or institutional service, test the actual travel and hold container. Venting may preserve texture but changes heat retention, so handling controls must be established for the operation. If a crisp edge is central to the menu description, make the air fryer the final cooking step close to service rather than an early batch process followed by a long covered hold.

Worked calibration: finding the useful load for your basket
Imagine a medium drawer air fryer and a 16-ounce/450-gram bag of regular whole beans. On the first trial, do not assume the package equals one appliance batch. Weigh 280 grams, note that the frozen beans cover the basket floor loosely with a few crossings, and preheat to 400°F/205°C. Cook dry for four minutes, shake, add two teaspoons of oil and dry seasoning, then continue for six minutes. At ten minutes total, cool and taste one thin and one thick bean.
If both centers are hot but the thick piece is firmer than desired, return the load for two minutes. If the surface is already dark, try 390°F/200°C on the next run rather than continuing until the thin beans dry out. Record a 12-minute result for 280 grams, including the two shake points and whether the second half began after a full preheat recovery. A statement such as "12 minutes" is not complete process data without those conditions.
For the next run, keep the bean lot, seasonings, temperature, and endpoint the same but increase the load to 340 grams. If the basket becomes a compact double layer and finishes unevenly after 14 minutes, you have learned that extra time does not compensate cleanly for the added depth. The practical capacity for this product and basket is closer to 280 grams. Cook the remaining bag in a second batch and check it earlier because the chamber is hot.
A private-label instruction can now say more than "air fry until crisp." It can recommend approximately 280 grams per batch at 400°F, identify the shake and seasoning points, provide a 10–14 minute window, and tell the consumer to stop at a hot center and dry, lightly blistered surface. Repeat the trial in representative alternative appliances before artwork approval. The goal is not one magical number; it is a direction that remains useful across reasonable household variation.
Frequently asked questions
How long do frozen green beans take in an air fryer?
Start with 10 to 14 minutes at 400°F or 205°C for a modest basket load, shaking once or twice. Thin or French-cut beans can finish sooner, while thick whole beans, a cold appliance, heavy frost, or a crowded basket may need longer. Use a hot center and dry, lightly blistered surface as the endpoint.
Do I need to thaw frozen green beans before air frying?
Usually no. Air fry loose frozen beans directly from the freezer. Remove loose ice, and briefly de-ice, drain, and dry only when the beans are locked in a hard frosty clump that cannot circulate in the basket.
What temperature is best for air fryer frozen green beans?
400°F or 205°C is a useful starting point because it releases moisture and browns quickly. If your air fryer runs hot, the beans are very thin, or you use cheese or sugar, reduce to 375°F or 190°C and check earlier.
For preparation details, see How to Air Fry Frozen Vegetables.
Why are my air fryer frozen green beans soggy?
The usual causes are an overloaded basket, heavy surface ice, too much wet sauce, no midpoint shake, or serving under a cover. Use a smaller load, let the first few minutes release moisture, shake well, and add wet finishes only after the surface is dry.
When should I add oil, garlic, or Parmesan?
For the most repeatable result, air fry the beans for three to four minutes first, shake off released moisture, then add a small amount of oil and dry seasoning. Add fresh garlic and Parmesan in the final two to four minutes so they do not scorch before the beans finish.
Can I cook a whole bag of frozen green beans in the air fryer?
Only if the basket can hold that bag in a shallow, loose layer. A typical one-pound or 450-gram bag may be too much for a compact basket. Split it into batches when the beans form a deep pile; capacity and airflow matter more than the package size.
Match the bean format to the promised cooking result
Tell us the cut, diameter, pack, market, intended air-fryer load, seasoning system, appliance assumptions, and trial volume. We can review the requirement, discuss sample testing, and confirm the proposed specification and documentation.
Request a quote Download the catalog